Sunday, November 3, 2013

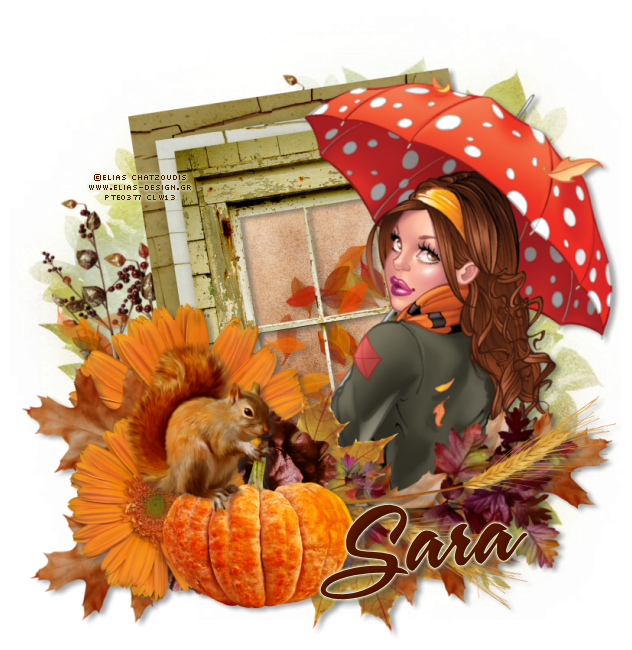
The Autumn Window


The Autumn Window

Tube of choice, I used Elias Chatzoudis
Scrap kit of choice, I used A County Autumn by Inzpired Creationz
Font of choice, I used A&S Snapper Script
Graphic Program of choice, I use PSP 9

This tutorial assumes you have working knowledge of paint shop pro, 
All of my tutorials are my own creation and any similarity
with any other tutorial is purely coincidental.
Please do not copy my tutorials to anyplace, please link back to my blog!

Open a new image 750x750 and flood fill white,
I Like to have room to work, this is your choice,
My tuts are written using this size image

Open paper 3 and c/p as a new layer, apply a mask of choice
I used DD_Fallmask 4 merge group

open scattered leaves and c/p as a new layer, now open
frame 4-Window and c/p as a new layer grab your magic
wand and click the openings and expand by 9 invert, and open
paper 2 c/p below the frame and hit delete, select none, move
the paper below the leaves scatter now open branch4 and
c/p as a new layer, bring to the top, resize by 80% and
rotate left by 15% open branches 1 and c/p as a new layer
arrange below the paper layer, mirror and rotate left by 30%
open flower 1 c/p as a new layer arrange right above the
frame resize by 80% open flower 9 and c/p as a new
layer below the other flower, duplicate, bring to the top
and resize by 72% open leaf 4 c/p as a new layer, resize
by 64% and place below the branch layer, duplicate and
rotate to the right by 36% duplicate and flip, and mirror
duplicate and flip again, now open leaf 1 c/p as a new layer
resize by 64% duplicate and flip arrange all to your liking, now
open pumpkin2 c/p as a new layer, resize by 64% open
squirrel and c/p as a new layer and resize by 65% now open
wheat 3 c/p as a new layer right above the branch layer
duplicate and flip, now add a dropshadow and tube of choice
hide the white background layer and merge visible.

I always resize my finished tag BEFORE adding my copyright info,
it makes this seem clearer, add your name and copy right
information and Save the way you prefer to save tags,

I hope you enjoyed this tut
smiles
christy
Ü


Friday, October 25, 2013

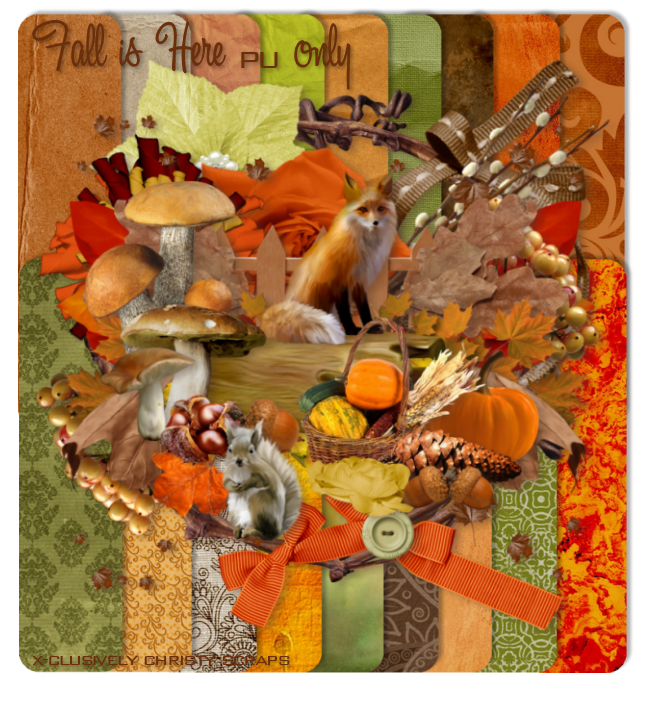
Fall Is Here


Fall Is Here

This kit is dedicated to what Fall looks like
in my yard, We see so many different color
leaves from brown to red to yellow, there are
tons of acorns, and Walnuts everywhere,
we also have families of squirrels and chipmunks
harvesting the nuts (hiding them all over the yard)
for when it gets really cold,
I tried to make this kit depict the colors I see each
day, It has tons of elements (NOT all shown of course)
and 18 papers

I do hope you all like
creating your tags and scrap pages
with it
christy

as always my Full size kits are $2.00
and my Taggers size kits are $1.50
Purchase Fall Is Here full size kit below
Purchase Fall Is Here Taggers size kit below


Wednesday, October 23, 2013

Trick Or Treat


Trick Or Treat!

Tube of choice, I used Caron Vinson and Amy Matthews
Scrap kit of choice, I used parts from Sarah's, Pimp'd Desingz and Grunge and Glitter and Digital Indulgence's Trick or Treat FB blog train
This is only a freebie until Oct 31st 2013
Font of choice, I used Spinstee
Graphic Program of choice, I use PSP 9

This tutorial assumes you have working knowledge of paint shop pro, 
All of my tutorials are my own creation and any similarity
with any other tutorial is purely coincidential.
Please do not copy my tutorials to anyplace, please link back to my blog!

Open a new image 750x750 and flood fill white,
I Like to have room to work, this is your choice,
My tuts are written using this size image

Open DI-Paper2 c/p as a new layer and apply a mask of choice
I used WSL_Mask306 merge group. I rotated mine to the right by
21% open sb_pmt_Trick-or-Treat_pp10 c/p as a new layer below
that mask and apply another mask of choice this time I used
HorsePlay's Pasture Mask 19 I resized this up by 120%

Now open sb_pmt_Trick-or-Treat_frame 6 c/p as a new layer
resize by 75%. now grab your magic wand click inside the frame
opening and expand by 9, invert and open pd13-pp-04 c/p as a
new layer below the frame, hit delete, select none, now open
DI_Bat c/p as a new layer and resize by 33% and rotate to the
left by 15% and then mirror it, now open pd13-swirl-01 c/p as a
new layer, mirror arrange above the skull mask layer and resize
by 45 and rotate to the left by 90% I pasted it again and
resize again by 45 and placed on the left of the frame,
open DI_Pumpkin c/p as a new layer below the bat layer,
resize by 55% now open pd13-flair-02 c/p as a new layer
resize by 36% and rotate left by 21% now open treat bag
from GG part of the kit, resize by 36% place right above
the pumpkin layer and arrange to your liking, now open
sb_pmt_Trick-or-Treat_flower 1 c/p as a new layer and
resize by 58% arrange layer to right above the masks layers
now open bow2 from GG part c/p as a new layer, arrange
right above the frame layer, open flower 2 from GG's Part
and c/p with the other flower layer, resize by 85% now open
pd13-flower-02 c/p as a new layer arrange to right above the
orange flower layer, now add a drop shadow and a tube of choice
hide the white background layer and merge visible.

I always resize my finished tag BEFORE adding my copyright info,
it makes this seem clearer, add your name and copy right
information and Save the way you prefer to save tags,

I hope you enjoyed this tut
smiles
christy
Ü


Sunday, October 20, 2013

Dark Night

Dark Night

Tube of choice, I used Rion Vernon and Elias Chatzoudis
Scrap kit of choice, I used Darkness Falls by Pimp'd Designz
Font of choice, I used Arthur Gothic
Graphic Program of choice, I use PSP 9

This tutorial assumes you have working knowledge of paint shop pro, 
All of my tutorials are my own creation and any similarity
with any other tutorial is purely coincidential.
Please do not copy my tutorials to anyplace, please link back to my blog!

Open a new image 750x750 and flood fill white,
I Like to have room to work, this is your choice,
My tuts are written using this size image

open pd13-pp-03 c/p as a new layer and apply a mask of choice
I used WynterMask153087 merge group, now open pd13-pp-08
c/p as a new and apply a round mask of choice, I used yezmask014

Open pd13-frame-03 c/p as a new layer move towards the left
and resize by 80% now grab your magic wand and click inside
the frame opening and expand by 9, invert and open pd13-pp-08
c/p as a new layer below the frame and hit delete, select none
now go to the round mask layer and using the raster deform tool
make it seem like it is just a bit bigger then the frame, now lets
open pd13-tombstone and c/p as a new layer,resize by 68%
open pd13-skull c/p as a new layer and resize by 40% now open
pd13-tree-01 c/p as a new layer right above the first mask layer
and mirror, now open pd13-raven c/p as a new layer and mirror
resize by 35% and place on one of the tree branches, now open
pd13-eye-02 c/p as a new layer, bring to the top and resize by
36% now open pd13-flower-06 c/p as a new layer below the tombstone
layer and rotate to the left by 90% and then resize by 42%
open pd13-light-02 c/p as a new layer, arrange right above the
frame layer and resize by 42% duplicate and mirror, arrange to
your liking. open pd13-feather c/p as a new layer, place below
the skull layer and resize by 40% open pd13-glass c/p as a new
layer right above the feather layer, resize by 40% now open
pd13-button-01 c/p as a new layer below the flower layer, mirror
and resize by 40% now open pd13-flower-05 c/p as a new layer
below the button layer and resize by 65% now add a dropshadow
and a tube of choice, hide the white background layer and merge
visible.

I always resize my finished tag BEFORE adding my copyright info,
it makes this seem clearer, add your name and copy right
information and Save the way you prefer to save tags,

I hope you enjoyed this tut
smiles
christy
Ü


Saturday, October 19, 2013

Fall's Window


Fall's Window

Tube of choice, I used Rion Vernon and Caron Vinson
Scrap kit of choice, I used Harvest by Pimp'd Designz
Font of choice, I used Affair
Graphic Program of choice, I use PSP 9

This tutorial assumes you have working knowledge of paint shop pro, 
All of my tutorials are my own creation and any similarity
with any other tutorial is purely coincidental.
Please do not copy my tutorials to anyplace, please link back to my blog!

Open a new image 750x750 and flood fill white,
I Like to have room to work, this is your choice,
My tuts are written using this size image

open pd13-pp-01 c/p as a new layer and apply a mask of choice
I used WSL_Mask363 merge group

open pd13-frame-05 c/p as a new layer, grab your magic wand
and click inside each opening and expand by 9, invert and open
pd13-pp-06 c/p as a new layer below the frame, hit delete
select none, now open pd13-pumpkin-02 c/p as a new layer,
bring to the top, resize by 65% open pd13-pumpkin-01 c/p as
a new layer below the others and resize by 65% now open
pd13-branch-05 c/p as a new layer right above the frame
mirror and resize by 88% and rotate left by 12 open pd13-branch-04
c/p as a new layer below the other branch, resize by 80% paste
again and mirror, I duplicated all three branches and rotated
to the left by 90% placing them along the bottom edge of the
frame, open pd13-ribbon-04 c/p as a new layer arrange below
the pumpkins and mirror, open pd13-acorn-01 c/p as a new
layer bring to the top and resize by 40% now open pd13-acorn-02
c/p as a new layer and resize by 40% I duplicated both
and "scattered" them among the pumpkins, open pd13-leaf-twig
c/p as a new layer arrange below the pumpkins layer, and resize
by 40% rotate right by 21% duplicate and mirror tuck them
to your liking, open pd13-pinecone c/p as a new layer, resize by
42% and rotate right by 26% place behind the pumpkins duplicate
and mirror now open pd13-leaf-01 c/p as a new layer, resize by
40% place below the pine cone layer and then duplicate and mirror
rotate to the left by 26% now open pd13-leaf-03 c/p as a new
layer, resize by 40% rotate right by 26% arrange below the
leaf twig layers, I duplicated mine a couple times, and rotated
and flipped them. now add a drop shadow and a tube of choice
hide the white background layer and merge visible.

I always resize my finished tag BEFORE adding my copyright info,
it makes this seem clearer, add your name and copy right
information and Save the way you prefer to save tags,

I hope you enjoyed this tut
smiles
christy
Ü


Alice's Tea Party


Alice's Tea Party

Tube of choice, I used Suzanne Woolcott
Scrap kit of choice, I used We R All Mad by Pimp'd Desingz
Font of choice, I used Bibleiotheque
Graphic Program of choice, I use PSP 9

This tutorial assumes you have working knowledge of paint shop pro, 
All of my tutorials are my own creation and any similarity
with any other tutorial is purely coincidential.
Please do not copy my tutorials to anyplace, please link back to my blog!

Open a new image 750x750 and flood fill white,
I Like to have room to work, this is your choice,
My tuts are written using this size image

open pd13-pp-01 c/p as a new layer and apply a mask of choice
I used 211InsatiableDreams mask, merge group

Open pd13-frame-03 c/p as a new layer, resize by 85% rotate to
the right by 6 grab your magic wand and click inside the frame
opening and expand by 9 invert, open pd13-pp-10 c/p as a new
layer below the frame hit delete select none, now open pd13-swirl-03
c/p as a new layer, mirror and rotate to the left by 6 now open
pd13-teapot c/p as a new layer,resize by 75% open pd13-tea-bag
c/p as a new layer and resize by 40%, now open pd13-rabbit
c/p as a new layer open pd13-greens-03 c/p as a new layer
place right above the mask layer, resize by 45%, I duplicated,
mirrored, rotated mine a few times, arrange to your liking, now
open pd13-greens-02 c/p below the other greens, resize by
45% again duplicate flip mirror rotate to your liking, now open
pd13-coffee-cup c/p as a new layer, resize by 42% place below
the tea bag layer, open pd13-brad-01 c/p as a new layer,
resize by 42%, open pd13-bottle c/p as a new layer arrange
right above the teapot layer, open pd13-card-01 c/p as a new layer
arrange right above the frame layer, resize by 30% open pd13-card-02
c/p as a new layer, resize by 32% rotate to the right by 9%
open pd13-flower-01 c/p as a new layer, right above the mask
layer, peek it out on the right side of the frame, open pd13-flower-04
c/p as a new layer above the mask layer and peek out on the left
side of the frame, open pd13-flower-07 c/p as a new layer, above
the last flower layer and again peek out on the right of the frame
now open pd13-ribbon-04 c/p as a new layer right above the
frame layer, add a dropshadow and a tube of choice, hide the
white background layer and merge visible.

I always resize my finished tag BEFORE adding my copyright info,
it makes this seem clearer, add your name and copy right
information and Save the way you prefer to save tags,

I hope you enjoyed this tut
smiles
christy
Ü


Built Tough!


Built Tough!

Tube of choice, I used Elias Chatzoudis and Rion Vernon
Scrap kit of choice, I used My Hero by Pimp'd Designz
Font of choice, I used Sovba Regular
Graphic Program of choice, I use PSP 9

This tutorial assumes you have working knowledge of paint shop pro, 
All of my tutorials are my own creation and any similarity
with any other tutorial is purely coincidential.
Please do not copy my tutorials to anyplace, please link back to my blog!

Open a new image 750x750 and flood fill white,
I Like to have room to work, this is your choice,
My tuts are written using this size image

open pd13-pp-01 c/p as a new layer and apply a mask of choice
I used 220InsatiableDreams Mask, Merge group

open pd13-fence-01 c/p as a new layer, go back to your mask
layer using the magic wand click outside the mask, now go to the
fence layer and hit delete, select none.open pd13-frame-06 c/p
as a new layer, click inside the frame opening expand by 5 invert
open pd13-pp-05 c/p as a new layer below the frame, hit delete
select none, now open pd13-leaves-01 c/p as a new layer,right
above the fence layer, resize by 80% rotate right by 90% duplicate
and mirror, now paste again resize by 75% and flip, duplicate 2 times
and place along the bottom of the frame, open pd13-cloth-strips c/p
as a new layer, bring to the top resize by 75% open pd13-flower-04
c/p as a new layer resize by 75% open pd13-flower-01 c/p as a new
layer, place below the cloth strips layer, open pd13-flower-03 c/p as
a new layer resize by 75% open pd13-ribbon-03 c/p as a new layer
right above the frame layer, open pd13-ribbon-01 c/p as a new layer
rotate to the right by 5%. Open pd13-staple c/p as a new layer and
"staple" the paper flower with star to the cloth strips, now open
pd13-dog-tag-02 c/p as a new layer, below the cloth strips, resize
by 55% and rotate right by 21%, open pd13-chain-01 c/p as a
new layer below the light green flower layer, open pd13-button-01
c/p as a new layer, bring to the top, now pd13-star-01 c/p as a
new layer, resize by 55% rotate left by 21%  now open pd13-flower-02
c/p as a new layer above the leaves layer and place near the left of the
frame, now add a drop shadow and tube of choice, hide the white
background layer and merge visble

I always resize my finished tag BEFORE adding my copyright info,
it makes this seem clearer, add your name and copy right
information and Save the way you prefer to save tags,

I hope you enjoyed this tut
smiles
christy
Ü